이번에는 Mysql 8.0 과 Mariadb 10.6의 sqldump파일 복구 성능 테스트를 진행해 보려 합니다.
한 일주일 정도 데이터를 준비 했습니다. 5개 컬럼 짜리 999999999 라인의 46G member_table3.sql 데이터를 넣어보려 합니다.
조건은 동일하게 하며 pkg 설치 하여 어떠한 컨피그 수정 없이 진행해 보려 합니다.
Compute H/W 사양 ( ProxMox 가상화)
- CPU : 2Socket 4Core 로 진행
- MEM : 16G
- HDD : 200GB
- OS : Ubuntu 20.04 focal
MariaDB [ted]> desc member_table3;
+---------+-------------+------+-----+---------+----------------+
| Field   | Type        | Null | Key | Default | Extra          |
+---------+-------------+------+-----+---------+----------------+
| seq     | int(11)     | NO   | PRI | NULL    | auto_increment |
| mb_id   | varchar(20) | YES  | MUL | NULL    |                |
| mb_pw   | varchar(20) | YES  |     | NULL    |                |
| address | varchar(50) | YES  |     | NULL    |                |
| mb_tell | varchar(50) | YES  |     | NULL    |                |
+---------+-------------+------+-----+---------+----------------+

MariaDB [ted]> select count(*) from member_table3;
+-----------+| count(*)  |+-----------+
| 999999999 |
+-----------+
1 row in set (8 min 16.642 sec)
Mysql 8.0 설치
https://dev.mysql.com/downloads/repo/apt/
MySQL :: Download MySQL APT Repository
The MySQL APT repository provides a simple and convenient way to install and update MySQL products with the latest software packages using Apt. The MySQL APT repository provides MySQL packages for the following Linux distros: The MySQL APT repository inclu
dev.mysql.com
아래와 같이 deb 파일을 받아서 pkg 설치 하시면 됩니다. 설치에 큰 어려움은 없을 거라고 생각 됩니다.
wget https://repo.mysql.com//mysql-apt-config_0.8.24-1_all.debdpkg -i mysql-apt-config_0.8.24-1_all.debapt update
apt install mysql-community-server mysql-community-client-core mysql-community-client mysql-common
Mysql8.0 복구
아래와 같은 결과가 나왔다. 결과를 보면 7시간이 넘게 걸린 것을 알 수 있다.
- 시작시간 : 2022-11-27_12:22:31
- 종료시간 : 2022-11-27_19:49:52
- 실행시간 : 26841 Sec
root@ted:~# cat test.log
===========> 2022-11-27_12:22:31
===========> 2022-11-27_19:49:52
Running Time: 26841 Sec
Mysqlsh 백업
Mysql 8.0 을 설치를 했으니까 다시 다른 테스트를 한번 해보려 한다. mysql이 자랑하고 있는 mysqlsh를 이용하여 dump 를 하고
백업을 해보겠다.
아래와 같이 mysqlsh를 설치를 해주고
apt install mysql-shellmysql에 들어가서 패스워드를 지정해 주지 않았는데 패스워드를 지정해 주겠다.
근데 어찌된 일인지 mysql8.0에서 아래와 같이 ERROR 1064를 띄운다. 그래서 우선
mysql> GRANT ALL PRIVILEGES ON *.* TO 'ted'@'localhost' IDENTIFIED BY '패스워드' with grant option;;
ERROR 1064 (42000): You have an error in your SQL syntax; check the manual that corresponds to your MySQL server version for the right syntax to use near 'IDENTIFIED BY 'lgt019lgt' with grant option' at line 1
다음과 같이 하는 방법으로 바꿔보니 되넹'!! ㅎㅎ
CREATE USER 'ted'@'localhost' IDENTIFIED BY '패스워드';
GRANT ALL PRIVILEGES ON *.* TO 'ted'@'localhost' with grant option;
flush privileges;
그리고 mysqlsh 를 이용하여 접속한다.
그럼 아래와 같은 프롬프트를 보실 수 있을 것이다.
oot@ted:/usr/local/src# mysqlsh ted@localhost
Please provide the password for 'ted@localhost': *********
Save password for 'ted@localhost'? [Y]es/[N]o/Ne[v]er (default No):
MySQL Shell 8.0.31

Copyright (c) 2016, 2022, Oracle and/or its affiliates.
Oracle is a registered trademark of Oracle Corporation and/or its affiliates.
Other names may be trademarks of their respective owners.

Type '\help' or '\?' for help; '\quit' to exit.
Creating a session to 'ted@localhost'
Fetching schema names for auto-completion... Press ^C to stop.
Your MySQL connection id is 107 (X protocol)
Server version: 8.0.31 MySQL Community Server - GPL
No default schema selected; type \use <schema> to set one.
 MySQL  localhost:33060+ ssl  JS >
그럼 이제 백업을 진행해 보겠다.
아래 명령어로 진행 하였고 아직 사용 방법은 정확히 숙달되어 있지 않다.
하기 내용을 보고 따라 진행 했다.
https://dev.mysql.com/blog-archive/mysql-shell-dump-load-part-1-demo/
MySQL :: MySQL Shell Dump & Load part 1: Demo!
MySQL Shell 8.0.21 includes some exciting new utilities to create a logical dump and do a logical restore, with a focus on ease of use, performance and integration. In MySQL Shell 8.0.17, we already introduced a multi-threaded CSV import utility util.i
dev.mysql.com
백업 속도가 진짜 빨랐다.
3분 16초가 갈렸다. 이제 복구는 어떤 속도를 보일지 점검해 보겠다.
MySQL localhost:33060+ ssl JS > util.dumpSchemas(["ted"], "/usr/local/src/ted.dump", {threads:88})
Acquiring global read lock
Global read lock acquired
Initializing - done
1 schemas will be dumped and within them 1 table, 0 views.
Gathering information - done
All transactions have been started
Locking instance for backup
Global read lock has been released
Writing global DDL files
Running data dump using 88 threads.
NOTE: Progress information uses estimated values and may not be accurate.
Writing schema metadata - done
Writing DDL - done
Writing table metadata - done
Starting data dump
104% (1000.00M rows / ~952.85M rows), 5.05M rows/s, 198.01 MB/s uncompressed, 5.84 MB/s compressed
Dump duration: 00:03:16s
Total duration: 00:03:16s
Schemas dumped: 1
Tables dumped: 1
Uncompressed data size: 38.78 GB
Compressed data size: 1.12 GB
Compression ratio: 34.5
Rows written: 999999999
Bytes written: 1.12 GB
Average uncompressed throughput: 197.55 MB/s
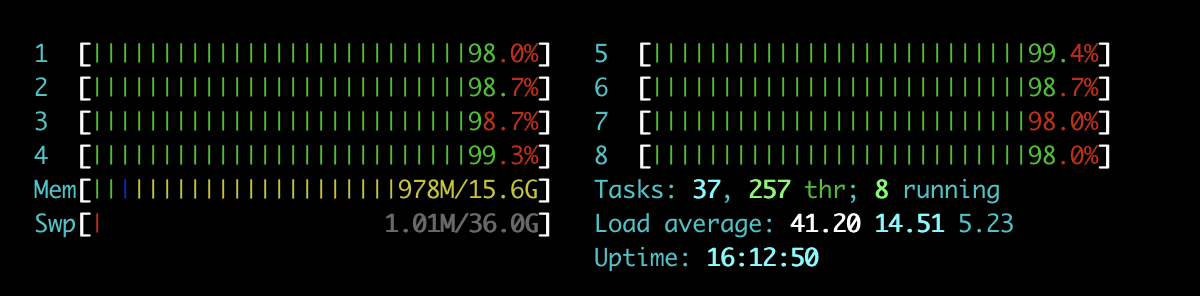
Average compressed throughput: 5.72 MB/s백업 당시 CPU 사용량을 보면 Full로 열심히 일한다.
그럼 이제 기존 table 삭제 하고 복구를 해보겠다.
Mysqlsh 복구
혹시 db내용 및 모든 것들을 다 삭제 하고 initialize 시키려면 아래와 같이 하면 된다.
mysqld --defaults-file=/etc/mysql/mysql.cnf --initialize-insecure한번에 되는일은 역시 없다 ㅋ
local_infile OFF 로 되어 있을 것으로 예상 되니 수정 해주겠다. 그래도 혹시 모르니 확인하고 수정해주자
 MySQL  localhost:33060+ ssl  JS > util.loadDump("/usr/local/src/ted.dump", {threads:88, waitDumpTimeout: 1800})
ERROR: The 'local_infile' global system variable must be set to ON in the target server, after the server is verified to be trusted.
Util.loadDump: local_infile disabled in server (MYSQLSH 53025)
역시는 역시다.
mysql> show variables like 'local_infile';
+---------------+-------+
| Variable_name | Value |
+---------------+-------+
| local_infile  | OFF   |
+---------------+-------+
1 row in set (0.00 sec)
우선 위 상태를 ON으로 만들어야 한다.
아래와 같이 해주면 ON으로 변경 된 것을 볼 수 있다.
mysql>  set global local_infile = 1;
Query OK, 0 rows affected (0.00 sec)

mysql> show variables like 'local_infile';
+---------------+-------+
| Variable_name | Value |
+---------------+-------+
| local_infile  | ON    |
+---------------+-------+
1 row in set (0.00 sec)
mysqlsh load 명령어
mysqlsh ted@localhost -e 'util.loadDump("/usr/local/src/ted.dump", {threads:8, waitDumpTimeout: 1800})' >> test.log 2>&1 &결과값이 맘에들지 않았다.
9시간 21분 6초가 걸렸다. 덤프 복구보다 더 오래 걸려 버렸다.. 백업은 상당히 빠른 속도로 진행되서 맘에 들었지만 예상과 너무 다른 결과값이라 당황스럽다. 그리고 mysql에서 말하는 얘기처럼 속도가 나오지는 않았다.
Scanning metadata...
Scanning metadata - done
Checking for pre-existing objects...
Executing common preamble SQL
Executing DDL...
Executing DDL - done
Executing view DDL...
Executing view DDL - done
Loading data...
Starting data load
Recreating indexes...
Loading data - done
Recreating indexes - done
Executing common postamble SQL
816 chunks (1000.00M rows, 38.78 GB) for 1 tables in 1 schemas were loaded in 9 hours 21 min 6 sec (avg throughput 1.15 MB/s)
0 warnings were reported during the load.
MariaDB 복구
똑같은 데이터로 복구 작업을 진행한다. MariaDB 10.6.11 로 진행 하였습니다.
혹시 설치 방법을 모르시는 분들은
https://babo-it.tistory.com/21
MariaDB 설치
mariadb 설치 하기 sudo apt-get install software-properties-common dirmngr apt-transport-https sudo apt-key adv --fetch-keys 'https://mariadb.org/mariadb_release_signing_key.asc' sudo add-apt-repository 'deb [arch=amd64,arm64,ppc64el] https://mirror.yon
babo-it.tistory.com
Mariadb 의 결과는 아래와 같다.
- 시작시간 : 2022-11-30_14:16:58
- 종료시간 : 2022-11-30_17:54:36
- 실행시간 : 13058 Sec
root@ted:~# cat test.log
START RESTORE
===========> 2022-11-30_14:16:58
===========> 2022-11-30_17:54:36
Running Time: 13058 Sec
결과적으로는 mariadb가 제일 빠른 엔진성능을 보여줬습니다.
Mysql8.0 의 mysqlsh 로 복구할때가 가장 빠를것으로 예상했는데, 사용 방법이 잘못되었는지는 몰라도 가장느린 속도를 보였습니다.
일단 단일 table로 테스트 한것이라 테스트 조건을 바꾼다면 결과 역시 바뀔 것이라고 생각합니다.
하지만 우선 같은 데이터를 가지고 했고 mysqlsh만 백업 요건이 다르기 때문에 다시 백업해서 테스트를 진행했습니다.
근데 충격적인건 같은조건의 환경에서 mysql과 mariadb의 시간차이가 2배 가까운 차이가 발생했다는 점 입니다.
- Mysql 8.0 : 7hr 27min 21s
- Mysqlsh : 9hr 21min 6s
- MariaDB 10.6 : 3hr 37min 38s
감사합니다.
'서버인프라 > 데이터베이스' 카테고리의 다른 글
| MariaDB, MySQL 사용자 관리 (0) | 2023.01.03 |
|---|---|
| MariaDB SlowQuery Log 설정 (0) | 2022.12.06 |
| Index는 얼마나 Query성능을 향상 시킬까??? (2) | 2022.11.25 |
| 한 가지 트릭으로 MariaDB를 30배 더 빠르게 만들 수 있습니다! (0) | 2022.10.31 |
| MariaDB update (1) | 2022.10.30 |


댓글